Based on DUKtape For PC-Linux by Rene Vivanco
Overview
This section details the specific details to setup PC-linux environment for Duktape development.
Setup
For initial development is useful to start with a PC environment. In this case, we choose using Linux-Ubuntu. By default, GCC compiler is installed and necessary libraries are part of the kernel. To create a new project under PC, follow the next steps:
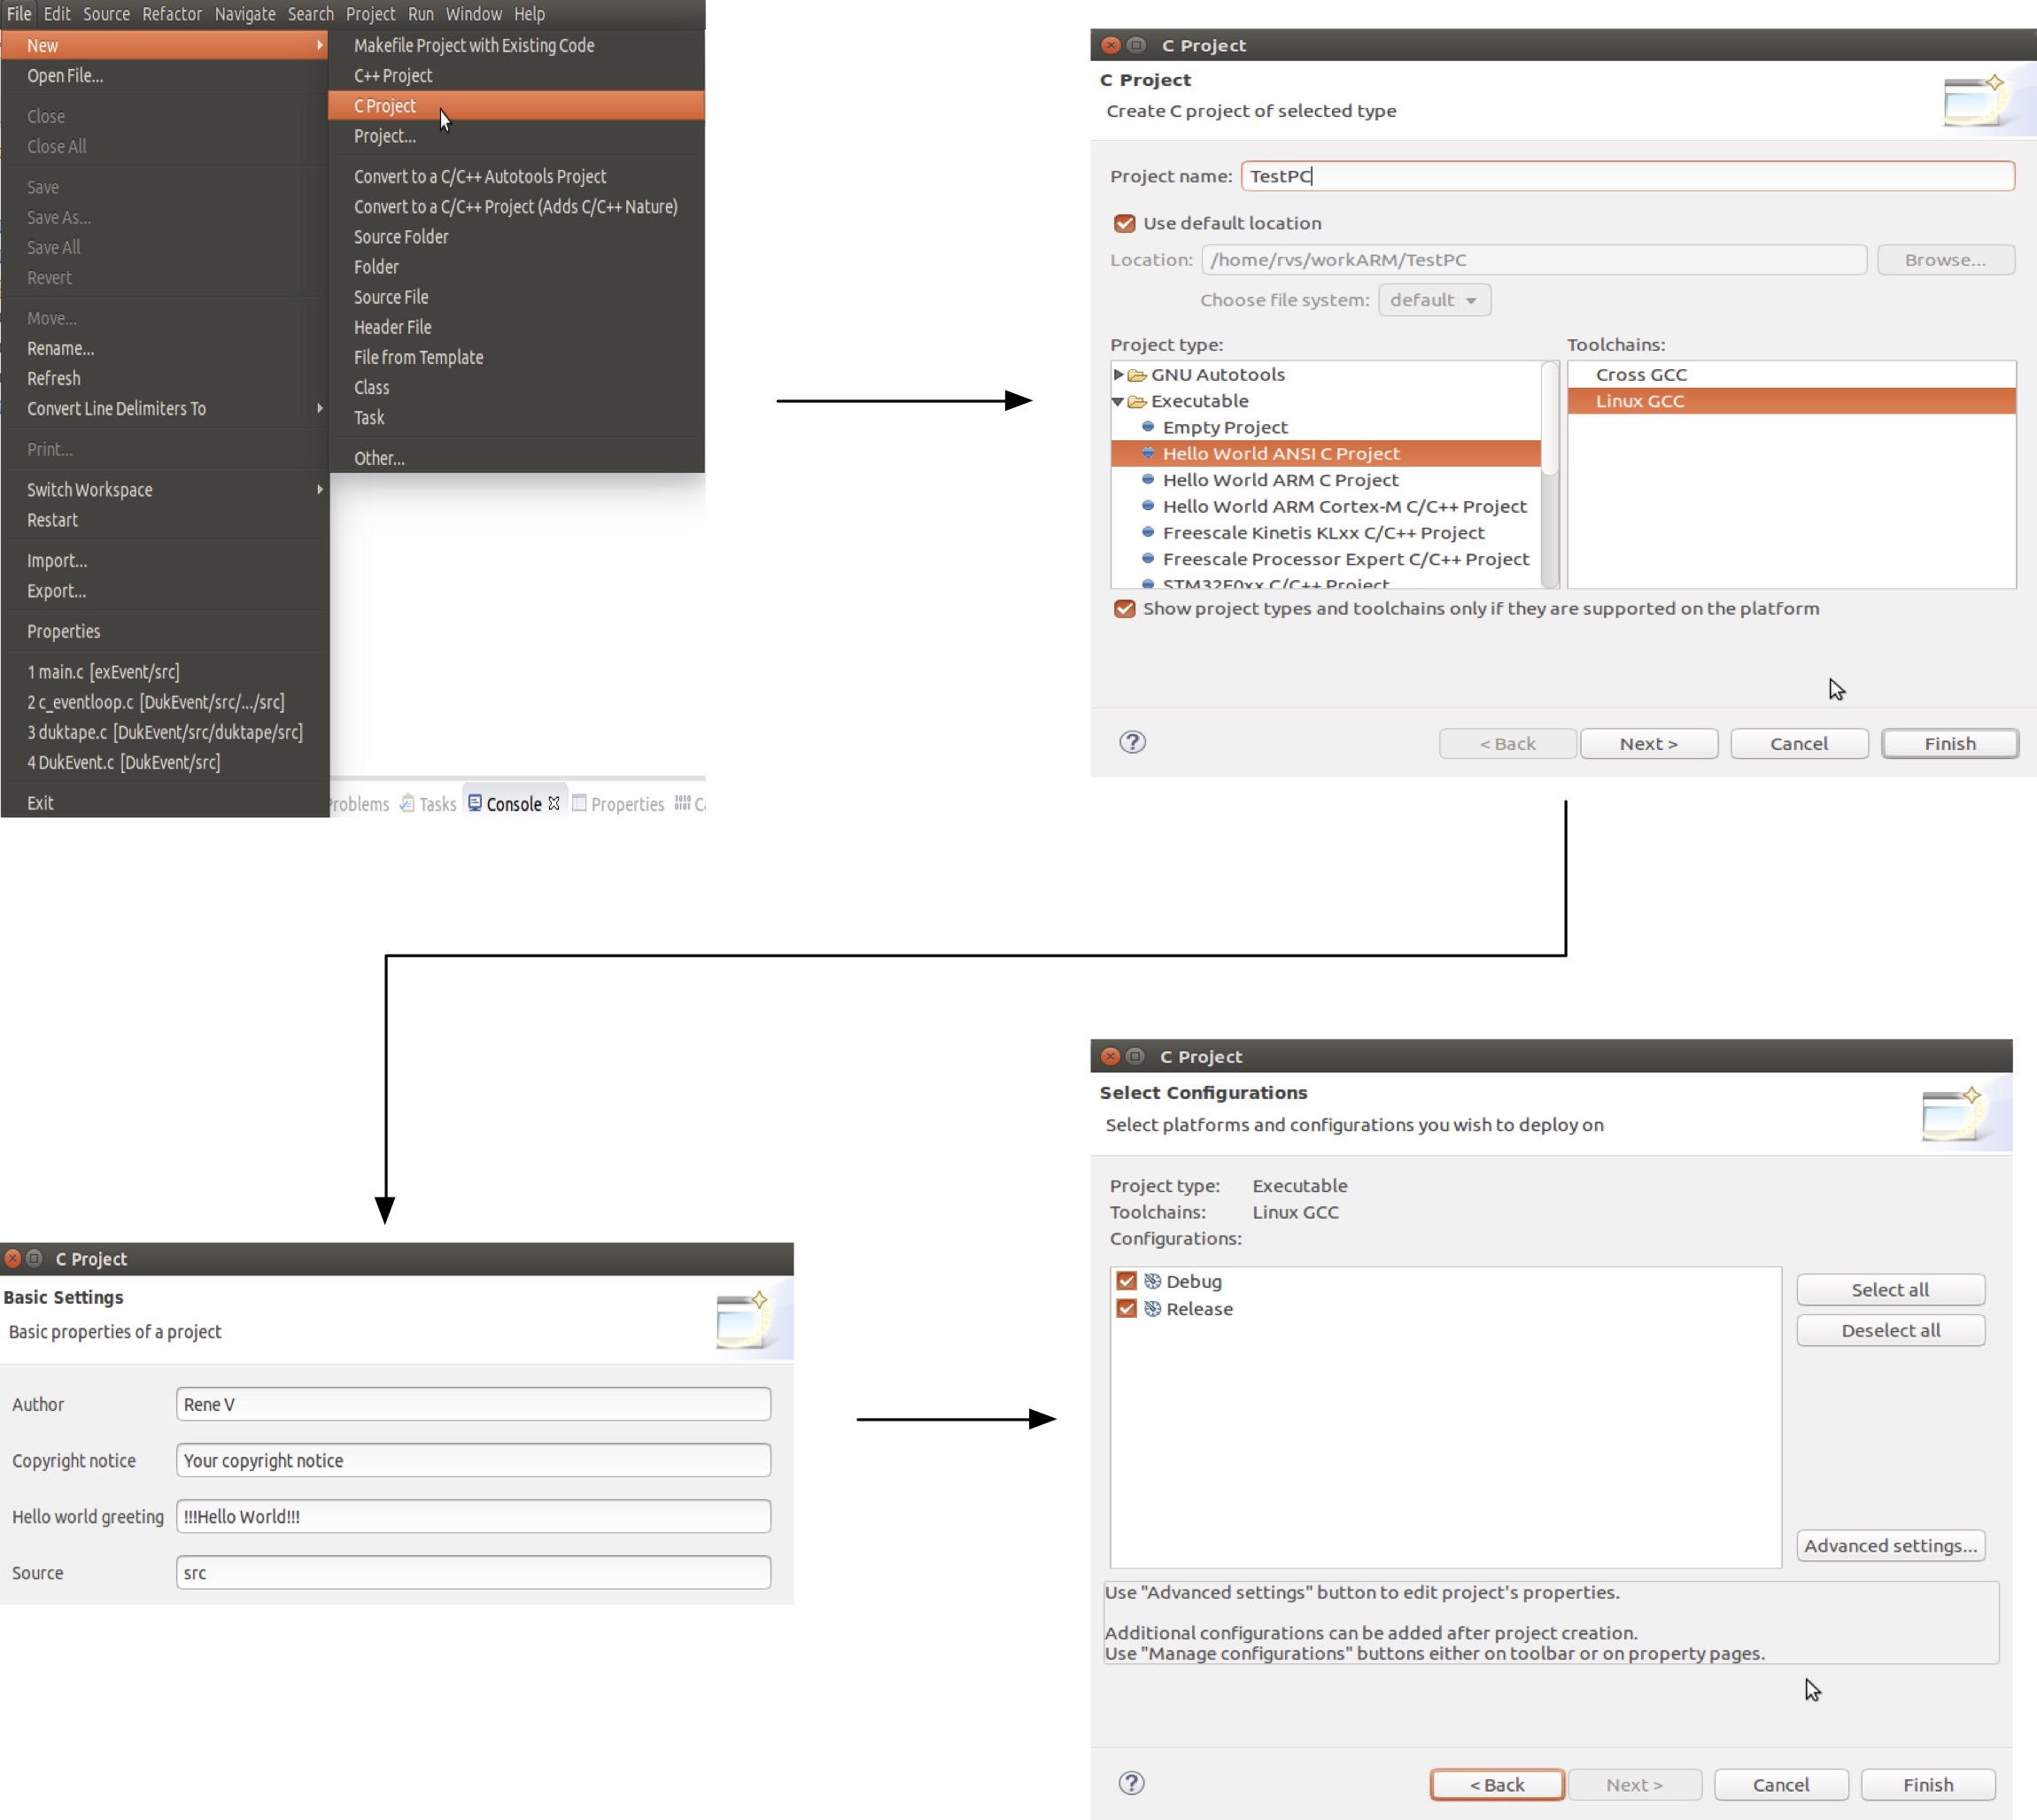
- Create a new project. Select File->New->C Project
- From the Option Window, select Hello World ANSI C Project and Toolchains as Linux GCC. Click Next
- Complete the next windows with your information and relevant comments.
Test. Hello World Sample
Probably the easiest way to develop an application using DUKtape is under the PC environment. The next steps details the preparation to make an application run under Eclipse:
- Create a new project for PC environment. In our case, we will call this application testDukPC.
- Once the project is created, compile it just to make sure that everything is ok.
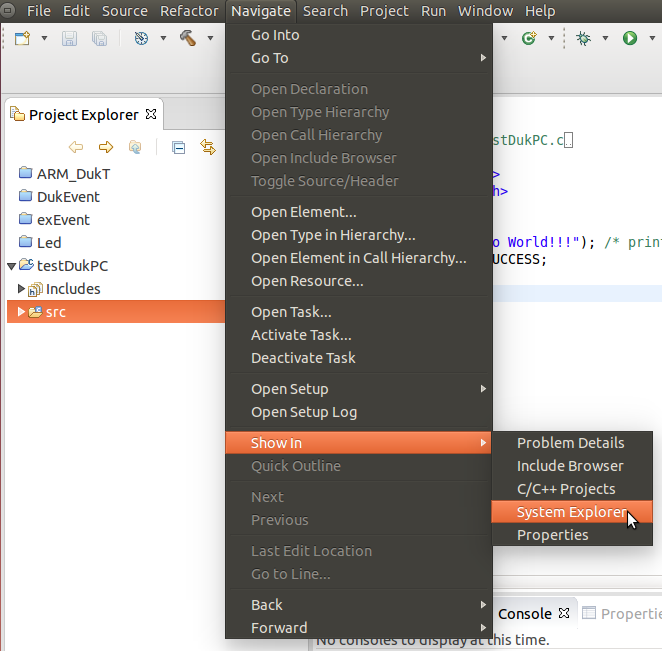
- Now we are going to include DUkTape source code. Highlight src, then go menu and select Navigate->Show In->System Explorer.
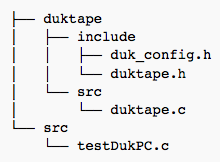
- Create a folder called duktape and inside it, two more folders; one called src and the other called include. We are trying to follow Eclipse file organization.
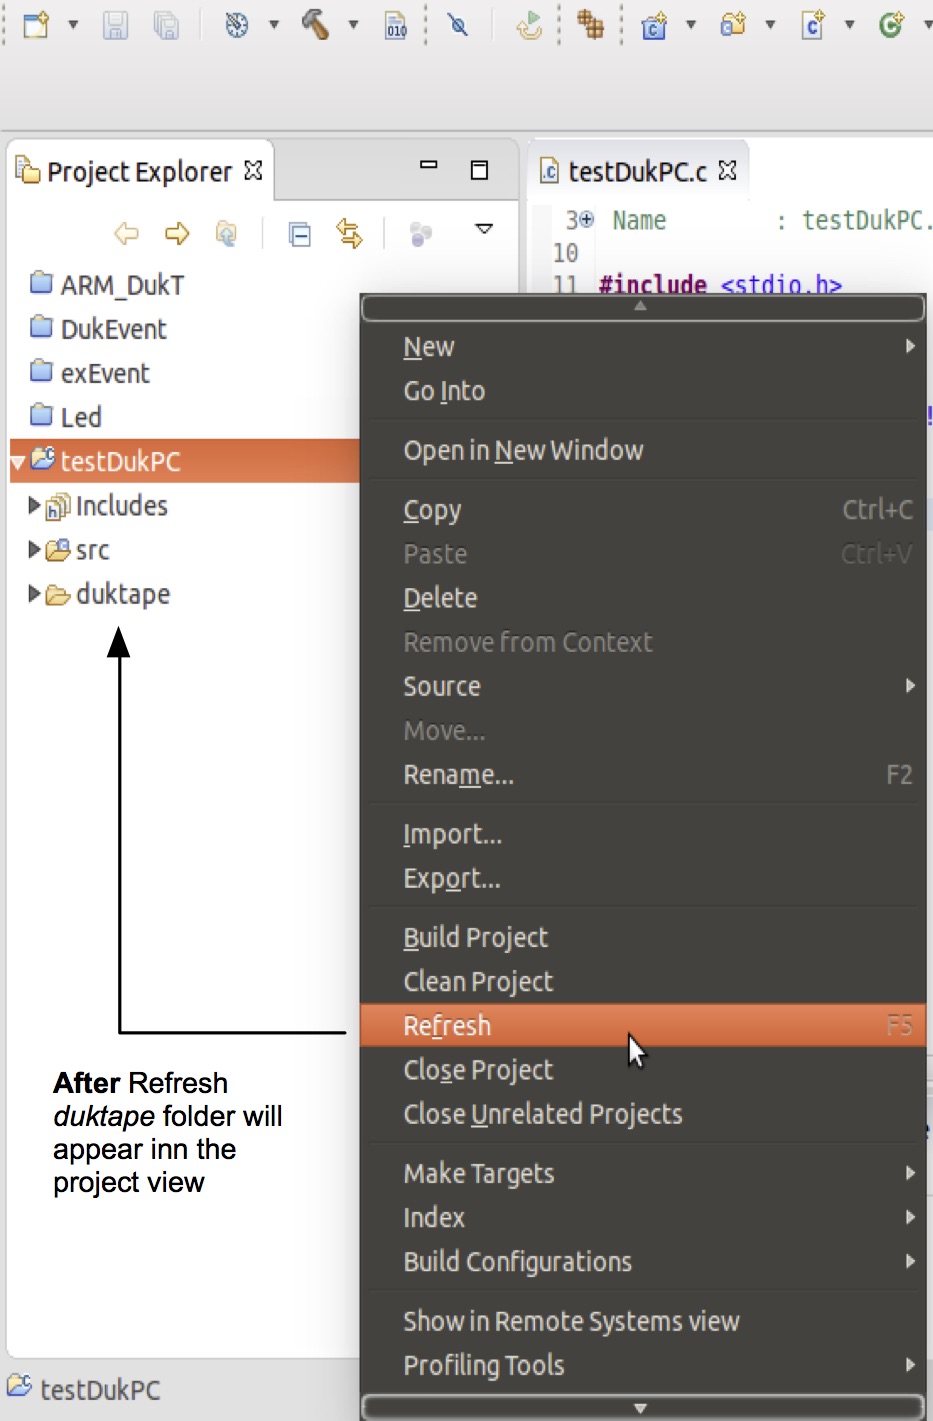
- On Eclipse, highlight the project name (testDukPC), right-click and select Refresh. This action will indicate Eclipse to include the source files in the build.
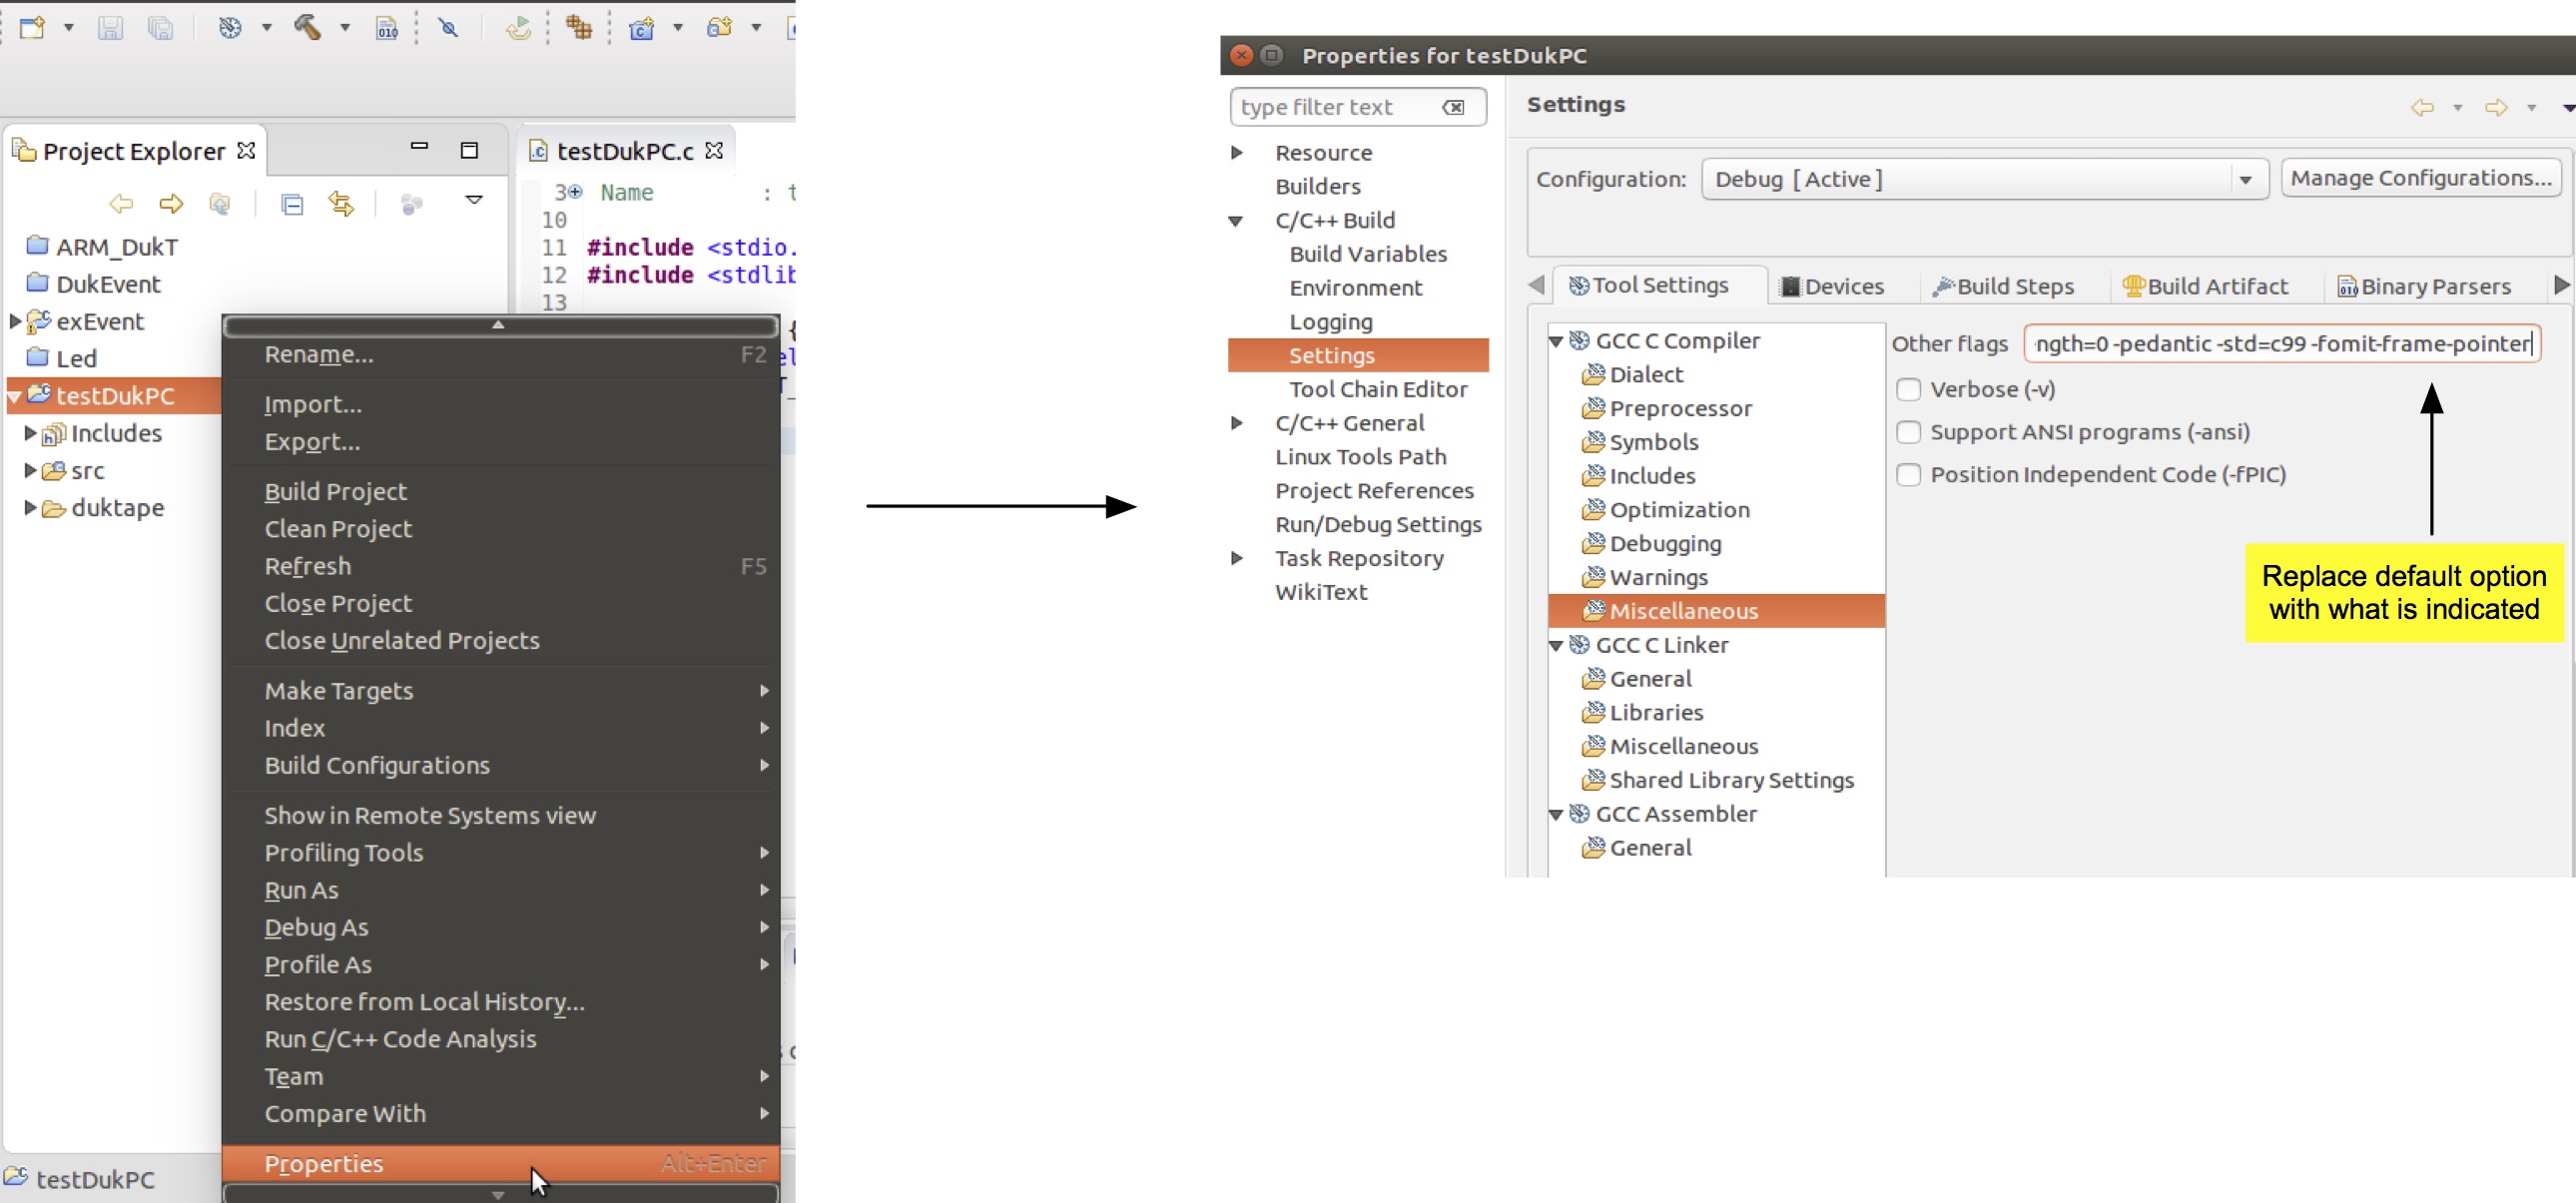
- As per duktape compile guidelines, now we need to adjust the compiling settings. To do so, Right-click on the project and select Properties.
- Within the Properties window, expand C/C++ Build and select Settings.
- On the GCC C Compiler, select Miscellaneous and type the next line:
-c -fmessage-length=0 -pedantic -std=c99 -fomit-frame-pointer
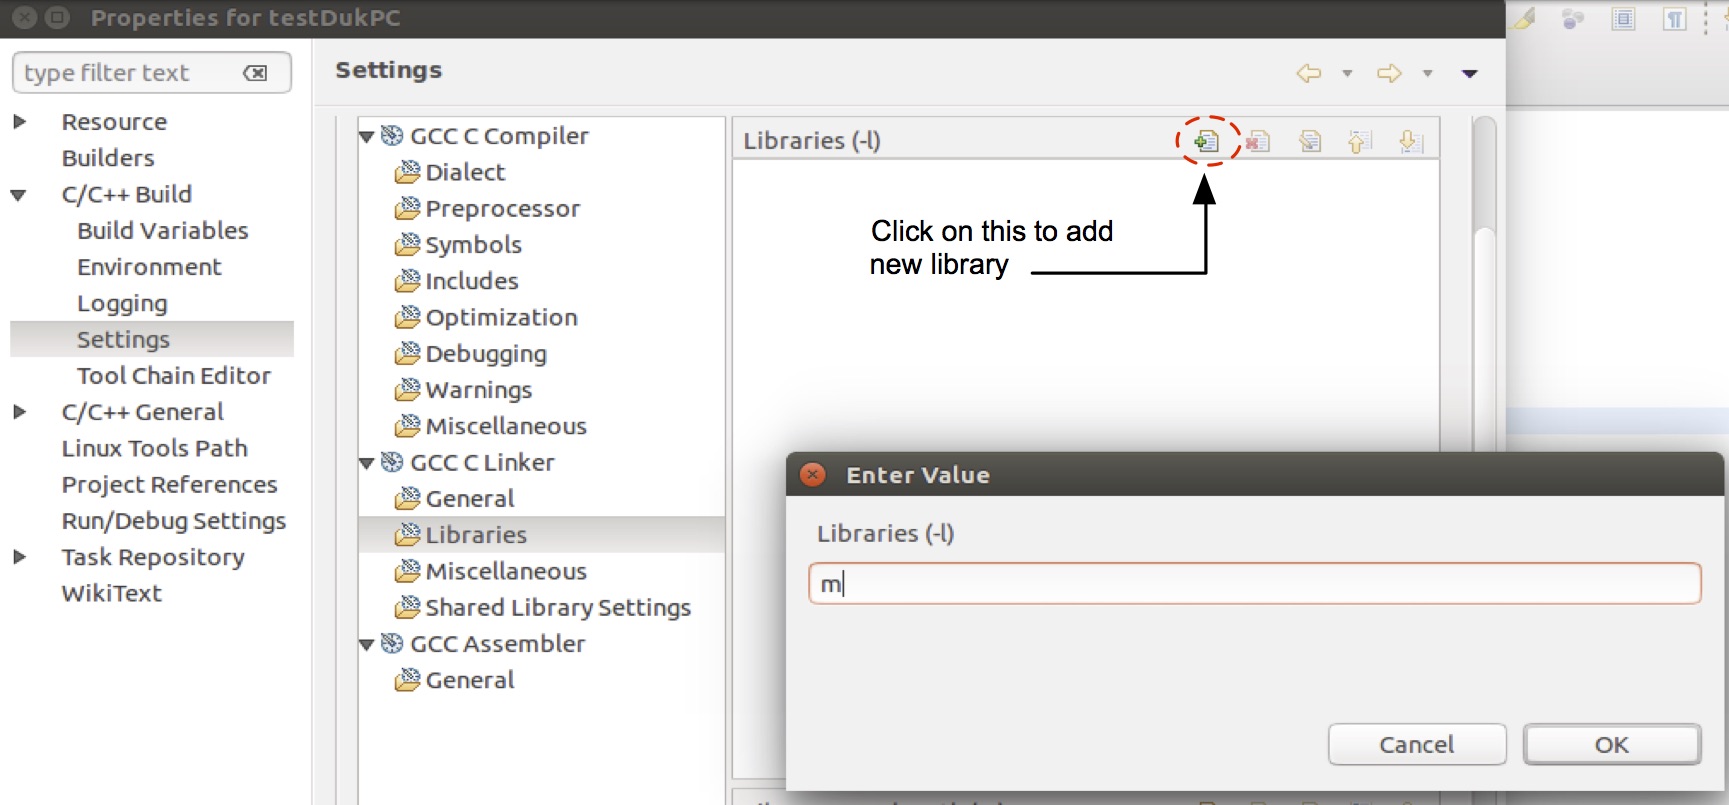
- Now under GCC C Linker, Select Libraries and add the library m. <br>
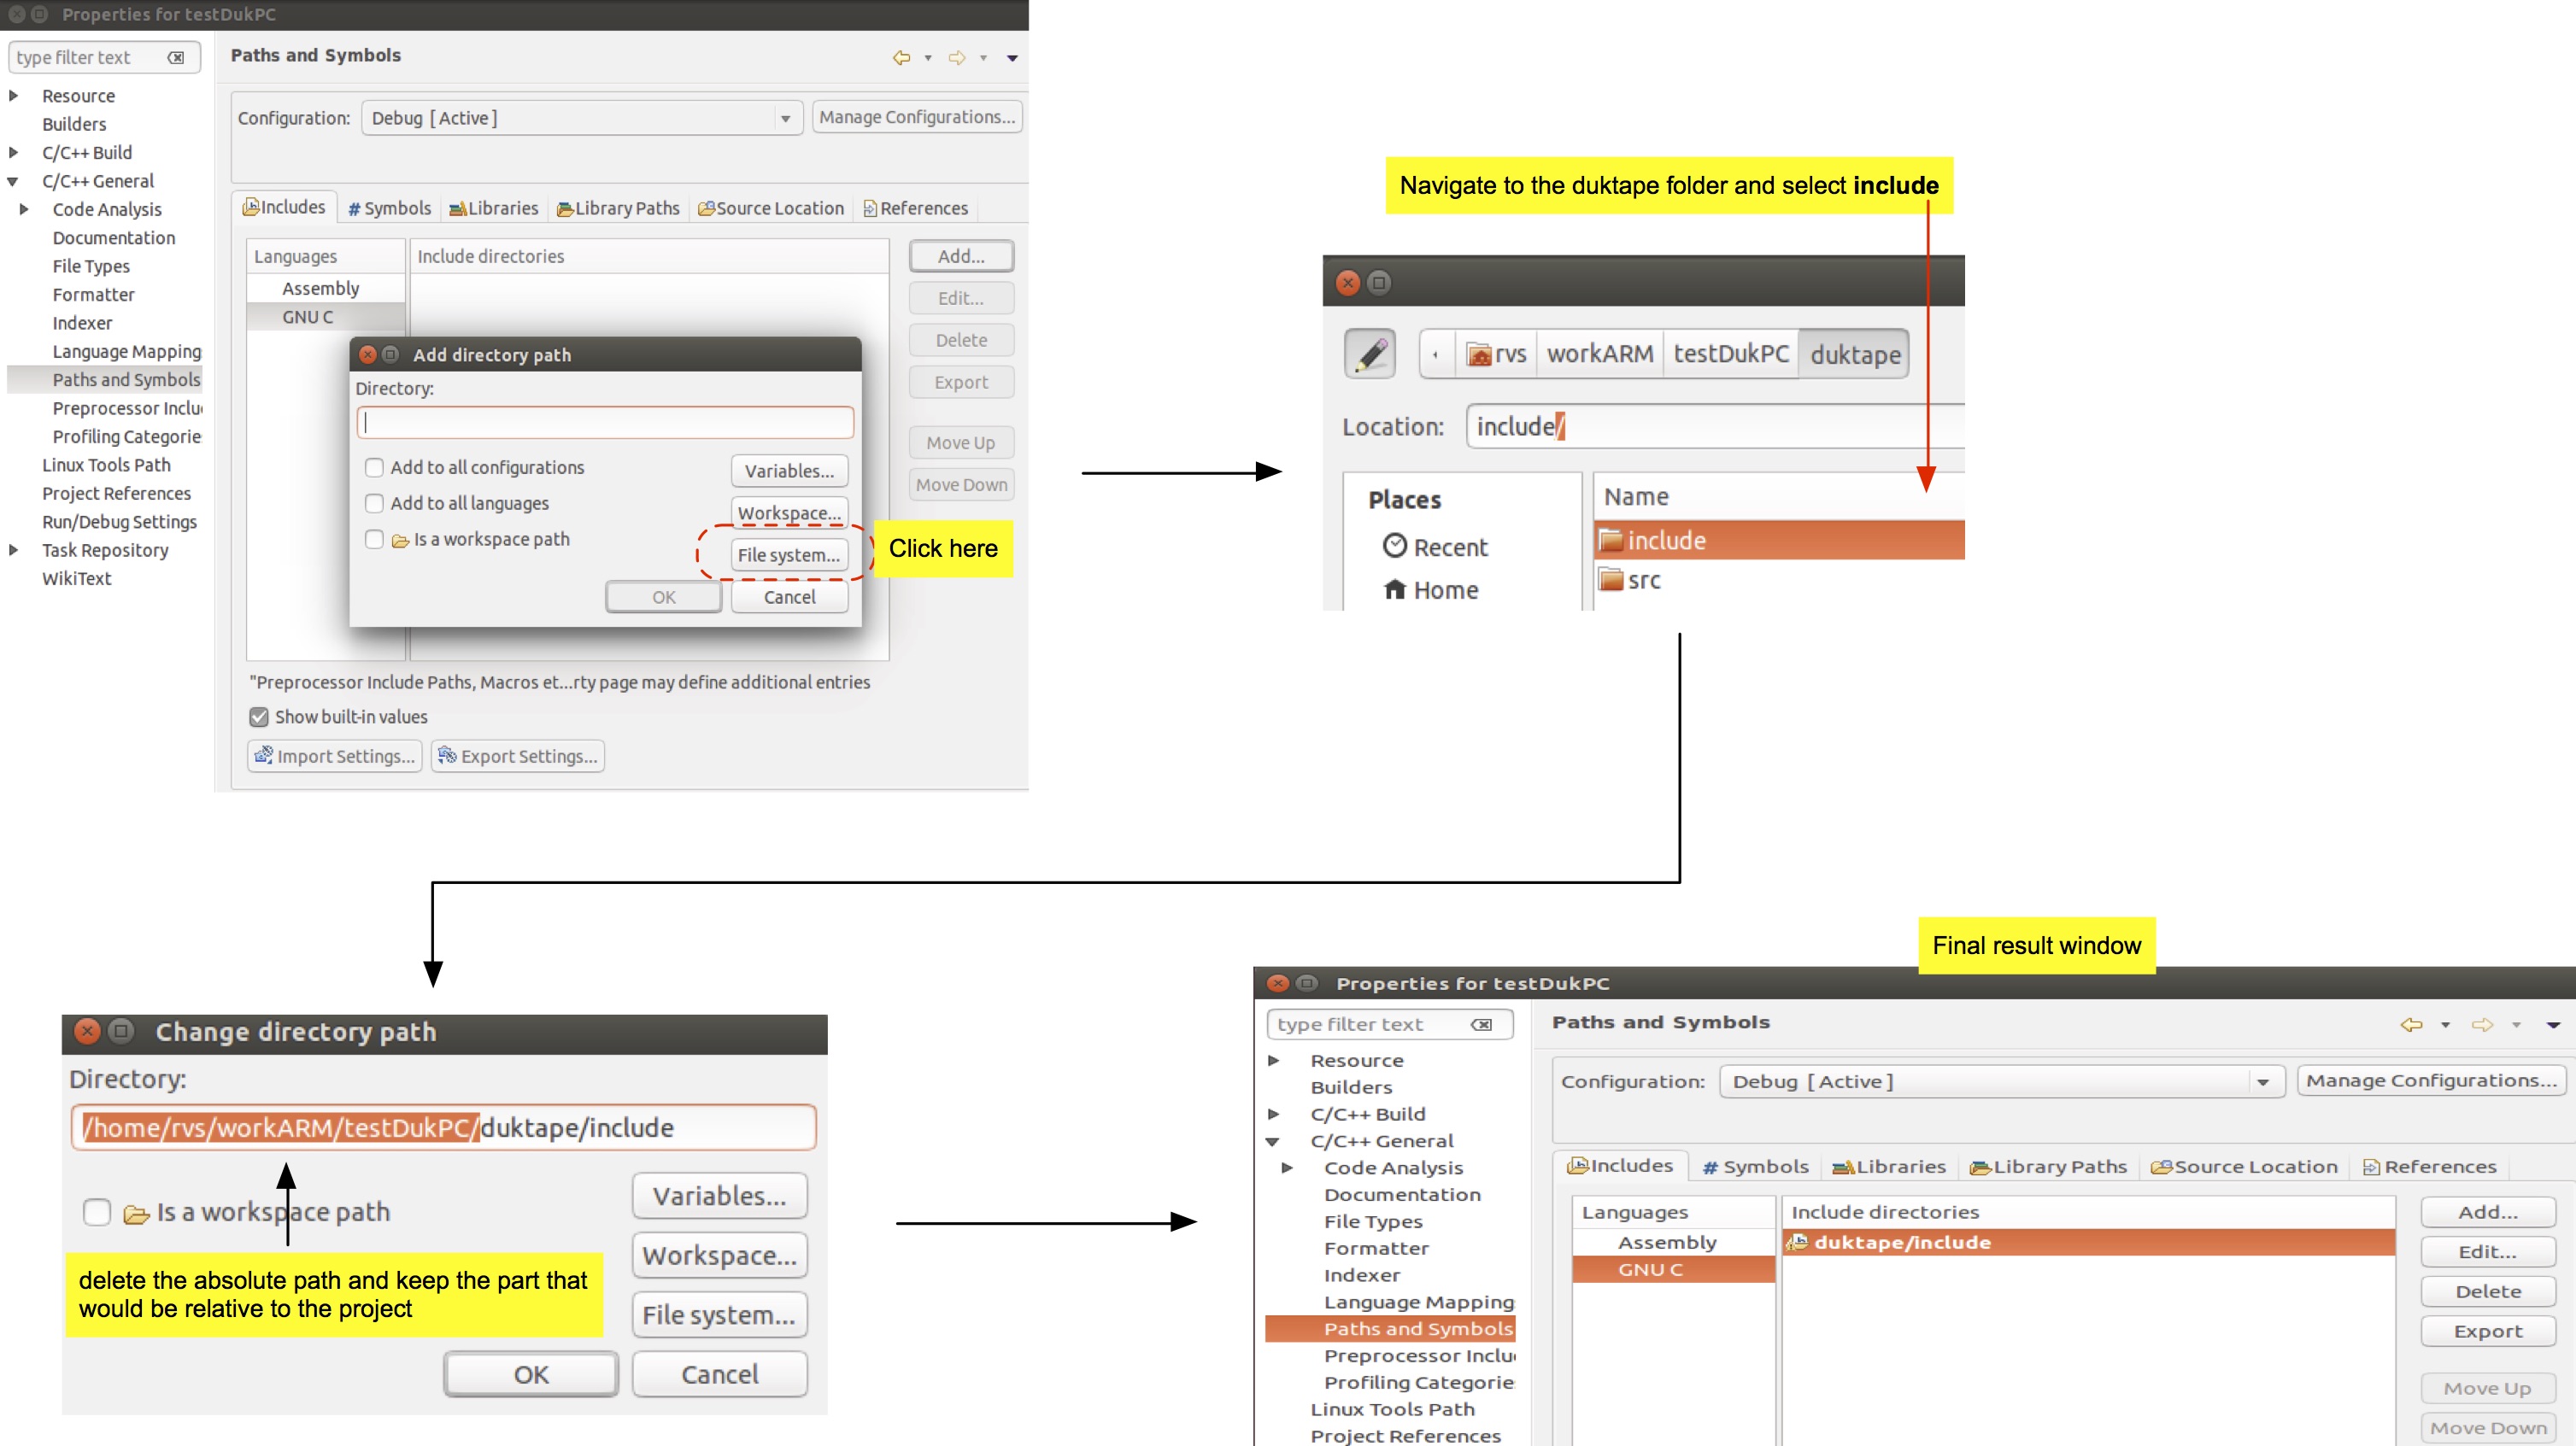
- Now we need to inform Eclipse about the new path created. Under Properties window, expand C/C++ General and select Paths and Symbols.
- Now Select GNU C and click Add. Click on File system and select duktape folder.
- It is better to have relative paths within the project. Edit the path and delete the absolute path leaving only the part for duktape.<br>
- Since we create a new folder outside src we need to indicate so to Eclipse. Select Source Location Tab, then click Add Folder and include duktape.
- Now we are going to create a simple program that will use duktape. We will use the test example from the duktape site. Modify main function as follows:
#include <stdio.h>
#include <stdlib.h>
#include "duktape.h"
int main(void) {
duk_context *ctx = duk_create_heap_default();
duk_eval_string(ctx, "print('Hello from Duktape!');");
duk_destroy_heap(ctx);
return EXIT_SUCCESS;
}
- Build project and run it. The program should print Hello from Duktape in the console.
See Also