
|
Main /
CapeCode0.2.1 ReleaseJune 15, 2018: CapeCode0.2.1 is available for download. CapeCode is a development environment and host for applications that use accessors, described at http://accessors.org. CapeCode provides a block diagram editor for prototyping IoT applications and code generators for deploying those applications on other accessor hosts. CapeCode is a configuration of Ptolemy II. DownloadsQuick start: Install Java 8 and choose:
Below are details: DescriptionThe CapeCode Accessor Host is an extension of http://ptolemy.org/ptolemyII, an actor-oriented modeling and design environment. For a tutorial on CapeCode, see the tutorial page. An example of a swarmlet rendered in Vergil, the graphical block-diagram editor for Ptolemy II, is: 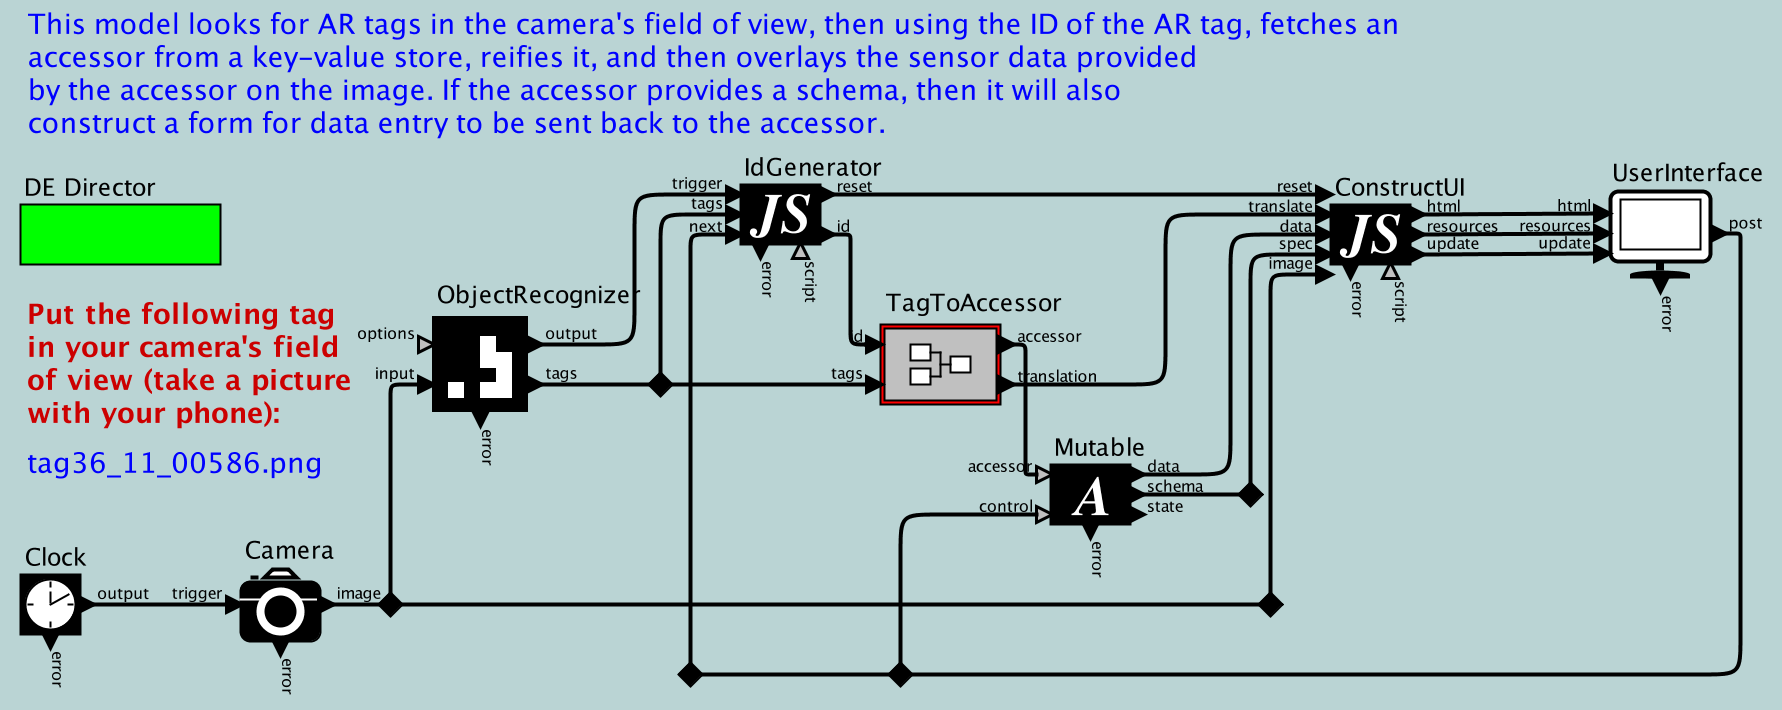 This block diagram realizes a simple augmented-reality application that identifies devices or services in the field of view of a video camera and dynamically instantiates an accessor that provides an interface to the device or service. Following the instructions below, you can run this application. DownloadRather than using the prebuilt installers below, we suggest Installing the most up-to-date version of CapeCode using Git. Installing CapeCode using prebuilt installersIf the above fails or is too difficult for some reason, you can use the installers from the nightly build as explained below. This will give you the most up-to-date version at the time you perform the installation, but to update to a newer version, you will have to reinstall. This is why installing from the Git repository as above is preferred.
For more information, see the more detailed instructions. If you plan to do any Java programming to extend Ptolemy II, then we recommend installing Eclipse and setting up Ptolemy II as a Java project. Running CapeCodeOnce you have installed Ptolemy II, you can run CapeCode with the following command: $PTII/bin/capecode This will bring up the welcome window, which looks like this: 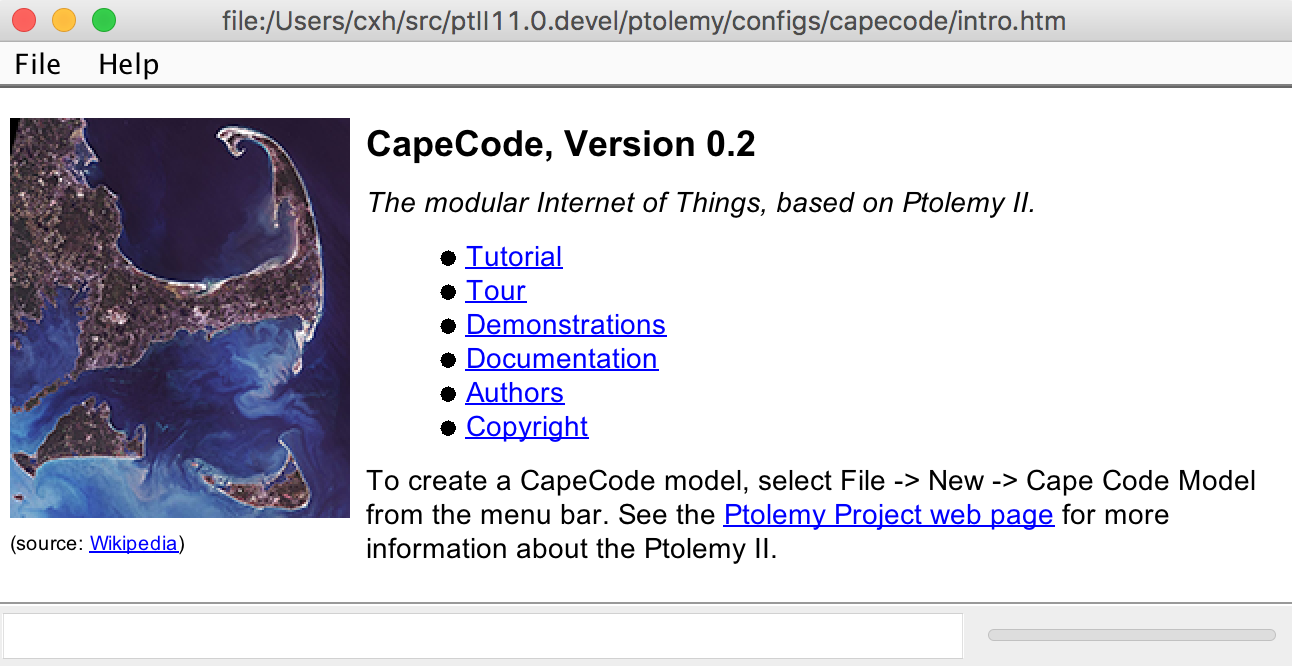 We suggest browsing the links here, particularly the Tour. To directly execute a simple demo that uses your machine's built-in camera, try: $PTII/bin/capecode $PTII/ptolemy/actor/lib/jjs/modules/imageFilters/demo/imageFilters/Random.xml Tutorial documents and solutions are available with the following command: $PTII/bin/capecode $PTII/ptolemy/demo/CapeCode/CapeCode.xml To execute a more interesting demo that creates a networked application, try: $PTII/bin/capecode $PTII/ptolemy/actor/lib/jjs/modules/webSocket/demo/WebSocketChat/Client.xml This demo is a chat client. The comments in the demo include a link to the chat server, which you must also run for the chat client to work. Click on the annotation that mentions the Server model and the run the Server model by clicking on the Run icon in the tool bar (it looks like play button). Then you can run the chat client and type into the dialog. You can start any number of chat clients and they will all connect to the same chat server. The chat server uses WebSockets to communicate with all clients. You can browse these models and open each of the icons (right click and select Open Actor) to see how the accessors are implemented. See Also
|